Wednesday, February 29, 2012

Embroidered Card!

Ever heard or sewing a card? No, well it's pretty great! I found this amazing DIY on http://blog.fossil.com...Wanna see what it looks like?

How cool is that?!

Alrighty so the materials are pretty simple:

Materials:
Cardstock (or any thick paper you want to put your design on)
Graph Paper
Tape
Embroidery Thread and Needle
Pencil


Step 1: On a sheet of graph paper make an outline of what you want to stitch onto your card. Pretty simple, make sure that
its the size of your card otherwise that could
turn into a sticky situation :O

Step two: Now that you've drawn your BEAUTIFUL design, cut your graph paper to the size of the outline, or the size of the
card, whichever comes first! 
Make sure the good side of your paper is face-up so you don’t end up with a mirrored image!

Step number tres (3) : Line up your paper with your card and tape it down. Then using the needle poke 
a lotta lotta lotta holes, maybe one ever milimeter, along the lines of your design. Your 
card should have holes that look something like this!
Step four: Remove your design and inspect your holes, fill in any that look like there aren't enough
Keep your picture for reference on what you want it to look like
Start embroidering!
Step five five five five five (I wrote that five times, ya get it :P) 
Explore different techniques, add some fun filler designs, get super duper creative!!
You can tape the ends and beginnings of the threads on the back
Just makes it easier!
Once you finish your design, write a cute little message to the person who's getting this MAGNIFICENT card (:
Your finished! Now, to hide all the thread, tape a blank index card to the back of the design and BOOM, your finished
You should be so proud, you finished a beautiful card that any
one you give it to is sure to love!


Wednesday, February 22, 2012

Cookie Dough Cupcake!!

Okay guys so I found this BRILLIANT recipe on actually a site called ps-i-made-this.blogsopt.com... how similar to mine right?! Great minds think alike I guess haha 


Okey dokey, so heres what you need:

Cupcakes
1 1/2 cups all-purpose flour
1/4 teaspoon baking soda
1/4 teaspoon salt
1/2 cup butter, softened
1/4 cup white sugar
1/2 cup brown sugar
1 egg
2 teaspoons vanilla extract
1 cup miniature semisweet chocolate chips

1 (18.25 ounce) box cake mix
1 1/3 cups water
1/3 cup canola oil
3 eggs

Icing
1 1/4 cups butter, softened
6 cups icing sugar
3/4 cup whipping cream
2 tsp vanilla
1/2 tbsp red food coloring

Step uno: Combine the flour, baking soda, and salt.. then guess what? Set it aside.. ha

Dos...: Whisk together the butter, white and brown sugar (you can use an electric mixer if you really want, it's a good arm work out though :P) 

Step tres: Add an (1) egg and vanilla extract to the above ^^ mixture until its ALLLLLLLLLL smooth. Then mix in the flour mixture from step 1 that you set aside. Finally the BEST part of all... add in the CHOCOLATE CHIPS :D


Step quatro (thats four for all you non spanish speakers) : Roll the dough into table spoon sized balls, no bigger because they have to go into our cupcake batter sooooooo.... no super duper huge cookies here guys. Put them in the freezer for at least 30 minutes to 2 hours.. So now you have time to make the batter & frosting so lets get started! 

SOOOOOOO the cookies are finito! 

Lets get onto the cupcake batter now :)
Step 1: Beat 3 eggs into a pretty big bowl with an electric mixer if you really want, I'd still do it by hand to get a good arm workout, burn these cupcakes before you even eat em', sounds pretty proactive to me :D. 

Step 2: Add the cake mix, canola oil, and agua (water,H2o,mi'in). 


Now, we're gonna prepare some cupcake liners and fill then 2/3 each with the batter we just prepared....

Sooooo... heres the REALLY cool part, put a frozen cookie dough ball on the top center of each cupcake. 

Now all you gotta do is bake bake bake bake. Oooooops, forgot to remind you, you should preheat your oven to 350F, so if you didn't do that just start the frosting and then when you bake you can sit down & rest

Through those cupcakes into the oven for 20 minutes and then wait for them to cool COMPLETELY. 


So.... you may think were done and this is as good as it gets.... WRONG. 

ICING TIME!! 

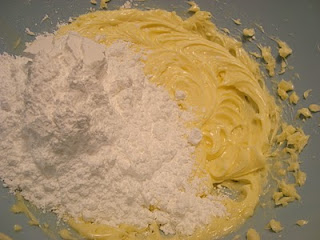
Step 1: Beat that butter baby! In a large bowl, beat the butter until fluffy..


Now... beat in the icing sugar and cream :D making 3 additions of sugar and 2 additions of cream


SO, nows the fun pretty part! Put in the vanilla and food coloring (: 

So, if you really want these to be fancy you can use a piping bag to with icing and pipe, you can just slather it on with a knife, or if you want it to be pretty but don't have a piping bag you can use a big plastic bag, fill it with icing, and cut a little triangle off of one of the bottom sides and pipe that way. 

AND NOW WE ARE FINISHED! Mmmmmmmmmmm, this may just be heaven on earth. 


Wednesday, February 15, 2012

Happy Valentine's Day! XOXOX

HI THERE! HAPPY VALENTINE'S DAY! :)


Today I want to tell you about sweethearts... and no, not the candy, the nails! I want to show you how to put sweet hearts on your nails, and just in time for Valentine's Day too!

So what you can start with are the things this blogger used to create her nails and which worked for me..
Pink (Julep Carrie)
Yellow (Julep Blake)
Green(Essie Navigate Her)
Purple(Essie To Buy Or Not To Buy)
Peach(China Glaze in Peachy Keen)
Light Blue (Sephora by OPI Nail in Havana Dreams)

Valentines Day Manicure I Love You Be Mine Nail Stamp Sweet Hearts

Now, you want this maniqure to look soft and supple, so I would suggest rounding your nails before you begin

Step one: For each nail, coat it in a different color, you may repeat the color once but no more than that, we want each nail to look individual! :) 

Step two: Top each layer off with Essie Matte About You to give it a chalky finish, just like a box of sweet hearts

Step three: Next, (This is the hard part guys) stamp each nail using Nail Art Diva's From the Heart 1and China Glaze in Make and Entrance along with a Konad Stamper and Scraper Set


This is a very difficult thing to do if your aren't skilled in doing your nails and it may be a pretty fun activity for you and your friend to do with one another. These nails add so much fun on Valentine's Day and always add some flare and holiday spirit to this loving day! 

So I know this may be super duper hard and thats why I included a video tutorial on stamping to help you out at much as possible!

Thursday, February 2, 2012

Mini Cherry Almond Pies! Yummm

Pies are such good treats, especially in the winter when all you want to do it sit on your couch, watch the snow fall outside, and relaaaaaaaaaax. So I found this AMAZING recipe from censationalgirl.com & knew I had to share. 

Step one:
Well, its a cherry pie right?! So we have to have cherries!
 Yum! I couldn't wait to share the finished product so I'm giving you a little sneak peak! LOL

Step two: 
So this recipe makes about twelve mini mouthwatering pies. For each pie, you can put in it your basic cupcake tin. So while the dough chills, I recommend using any premade pie crust you can buy at the store (just makes it so much easier!) Get a pitter & pit those cherries!

 Step three:
Cherries are so naturally sweet, so thats what were gonna work with here. Just add 4 cups of pitted cherries, 1/3 cup of sugar and 1 tablespoon of pure Almond Extract.
 Step four:
You need enough dough for about 3 pie crusts if you really want maximum flakiness and deliciousness (mmmmm..) Roll out the dough and use a small appetizer bowl to make the first layer of crusts for your pies! my Step five:
Once in the cupcake tin, layer each one with pie filling, placed another layer of crust on top, pinched them closed with a fork, then brushed the top with egg white.  Thennnnnn bake them at 350 degrees for about 35 minutes (or when the crust turned golden brown

A shazam! Perfect, mouthwatering delicious mini pies that are amazing to each & not so harsh on your diet because they're mini! Hope you enjoy! XOXO
centsational girl pie and bowl of cherriescentsational girl mini cherry pie on platecentsational girl pie and teacentsational girl cherry almond pie up close
Hey guys, just a couple free printables I found on Pintrest.Com a second ago, thought you could use them for your DIY Projects!


XOXOXO

Wednesday, February 1, 2012

Light Bright!

Hey guys, its Alexis. My favorite do it yourself project HAS to be nails! So to do this you need to follow  7 steps and abracadabra, you have amazing nails.

This project, originally thought of by Lauren Conrad, is ideal for the holiday season or any holiday really. It will add a spark of happiness and holiday joy to your everyday life and can really bring out the holiday spirit in you! Be prepared for an awesome DIY

Things you need?

  • base and top coat
  • two colors of nail polish (any color)
  • white nail polish
  • small scissors
  • black (of any dark color) string
  • pointed q-tip

Step one: 
Make sure you have clean nails. Then once you are sure, put one coat of white nail polish (preferably OPI) on. 
Step two:
 After that coat dries, shortly after put a clear topcoat on it. This coat is what the string is going to adhere to so make sure that it isn't too quickly drying 
Step three:
 Put black(of any other darker color) string on your nail and drape it continuously over the nail. Do NOT cut it yet.
Step four: 
Add a thin, quickly drying clear coat on top of the nail to make sure the string adheres.
Step five: 
Once the clear coat dries, cut the string using small nail clippers or small scissors. Be careful not to cut it too short of, goodness cut your finger.. OUCH!
Step six: 
Then your going to add the lights! You can use any colors, blue and gold for Hanukkah or green and red for Christmas! Any colors you can think of. Once the colors are chose, use a q-tip then dip it in the polish and gently dap on nails.
Step seven: 
Let your lights dry, then apply a clear top coat to set everything in place.. and your done! :)

Lots of Love, 
Alexis